Introduction
I don’t know who needs to hear this, but…you can create your own translation engine from the comfort of your own couch. And you can do it cheaply, thanks to Google Colaboratory and EC2 spot instances.
A little background before we jump into the tutorial: As I mentioned in one of my posts last month, I’m working on a pet translation and e-publishing project and, after hooking into other translation engines and curious about the idiosyncracies I saw, I wanted to understand more about neural machine translation and take a little more ownership of the process.
My background is in systems/QA, so of course I went down a bit of an infrastructure rabbit hole, spending more time experimenting with the systems around my translation models vs. their accuracy (although they’re good enough to impress me for my niche needs, I’m not competing with Google any time soon!).
After running a few tests with smaller sets of parallel corpora using OpenNMT-py (Open Source Neural Machine Translation in PyTorch), I compiled and normalized a nine million line parallel corpus (one file for the source language, one for the target) that included the usual suspects: the Wikipedia corpus, OpenSubtitles, and a small corpus of open source literature.
To make things fun, I included a few excerpts of public domain literature that I normalized and/or translated myself and an open source Russian dictionary that I converted to SQLite for easy extraction/manipulation. Originally, I generated the SQLite database to post-process the “unknowns” that came out of OpenNMT-py translation, but I decided to add it to my data because why not? (I’m sure someone will answer that one for me, but some of us always like to throw the kitchen sink into the soup pot.)
When I ran my first tests on smaller data sets as a proof-of-concept, I used a CPU-bound Medium instance on AWS EC2…but to do what I want with this bigger data set would take a really long time. Even with my measly 200k line data set, the training was looking like it’d extend 16 days or so; I’d had enough by day 12.
I really needed access to better memory and GPU to even attempt it. While we’ve got a GPU that we used once upon a time for Bitcoin mining experiments, it’s in storage as we’ve been pretty mobile for the last two years…so that was out. And don’t even get me started on trying to use my trusty old Zenbook’s NVIDIA GeForce GPU…I will get it and Xorg to play nicely together, and it may become a future blog post…but not today…and I doubt recent versions of CUDA would support it anyway.
But all is not lost! Google Research has released Google Colaboratory to the public, and it’s kind of crazy-in-a-good-way: Free access to GPU (and TPU(!)) instances for up to 12 hours at a time.
And there’s always Amazon’s EC2, which you can get a 60-70% discount on if you use a spot instance. While my Alexa skill programming misadventures may not have gotten me fame and buckets of cash — heck, recruiters don’t even spam me — they have provided me with $100/month in free AWS credit, which one can argue isn’t such a bad deal.
The problem with both options, though, is that you can lose access at any time, and right in the middle of training. And you’ll never regain access as once an AWS spot instance is terminated, it’s gone…unless you’re copying out to S3. Amazon does give you a two minute warning, but let’s face it: While it’s kind of fun watching the logs roll by…they don’t exactly roll by, it’s more like slugs racing through cold molasses…and the chance you’re actually going to be paying attention when you get booted off is pretty low.
Same with Google Colab’s runtime: Once you’re disconnected, you lose access to your work…unless you save to Google Drive.
On the positive side, though, these systems’ ephemerality is easily handled: On AWS, you can write out to S3, and for Google Colab, use Google Drive. I suspected that working from preprocessed data on Google Drive slowed training down, but I tested it and found no appreciable difference in training speed when my training and model files were on Google Drive vs. copied to local disk within the runtime.
With this setup, I’ve actually been cross-training models using both systems, using rclone on AWS to interface with Google Drive.
If you’re interested in playing around with something similar, read on — I’ll walk you through setup, preprocessing, training, and translating using sample data from the OpenNMT-py project, along with a pre-configured Google Colab notebook, helper scripts, and a public AMI you can use to reduce your setup time.
OpenNMT-py with Google Colab
While I was working on this blog post, the team at OpenNMT-py released an official Python package, which simplified the setup process a great deal. You can also skip this entire section and just load this sample notebook into Colab and edit it as needed for your own files and configuration options. If you don’t already have a lot of space on Google Drive, you may want to spring for the $20/year Google One upgrade to get 100GB.
The steps below give you some sample data to play with; but if you’re using your own data, you’ll want to copy your source and target corpus files, validation files, and any other files you need to preprocess or train to Google Drive before you start (because I did a lot of my data cleanup on AWS EC2, I used rclone to copy files from EC2 to Google Drive). I also had a lot more success using rclone than the Google Drive web interface for some reason…even for copying up small text files.
A tip for rclone or any other Google Drive system you’re trying to set up if you want to copy things back and forth on a “headless” system: Set it up on your local machine to get the configuration, and then copy to your instance — Google won’t authenticate you without a Javascript-enabled browser, and elinks ain’t it, or at least, it wasn’t for me. I wasted way too much time stubbornly trying to figure out how to connect to Google Drive, setting up development apps, etc…and all I really needed to do was generate the config somewhere with a Javascript-enabled browser.
-
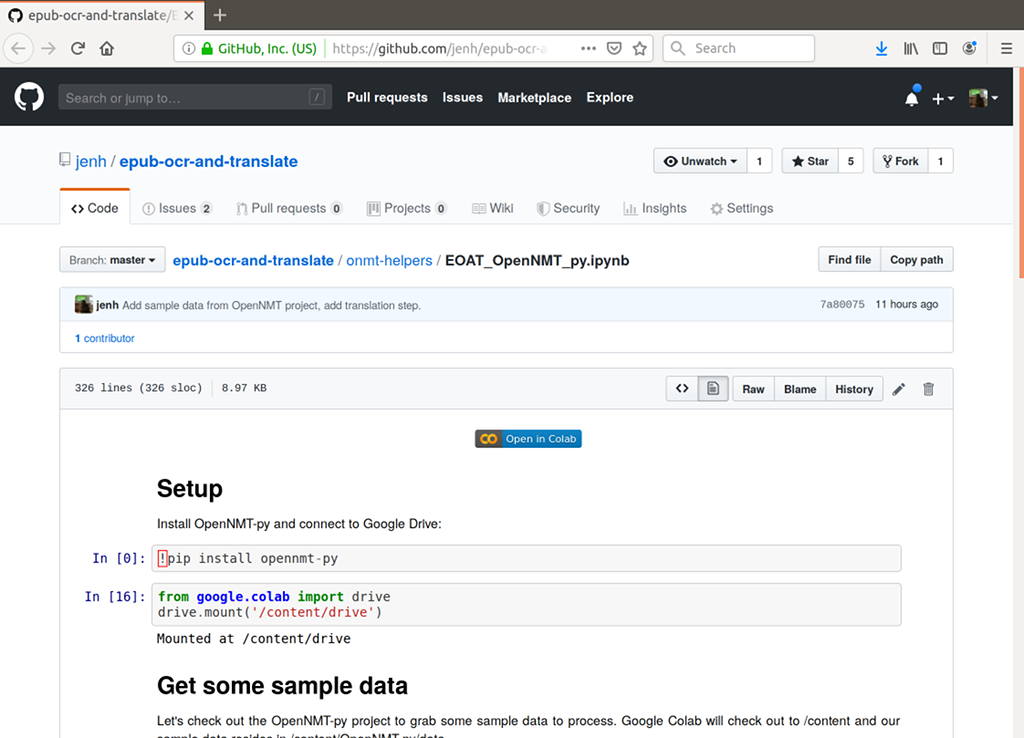
Start a new notebook at https://colab.research.google.com/notebooks/welcome.ipynb, or just import the EOAT sample notebook by opening it via this link on Github and then click the Open in Colab button.
-
Verify that your runtime is configured with Python3 and a GPU: Runtime > Change Runtime Type.
-
Install OpenNMT-py and its dependencies:
!pip install OpenNMT-py -
Connect to Google Drive:
from google.colab import drive
drive.mount('/content/drive')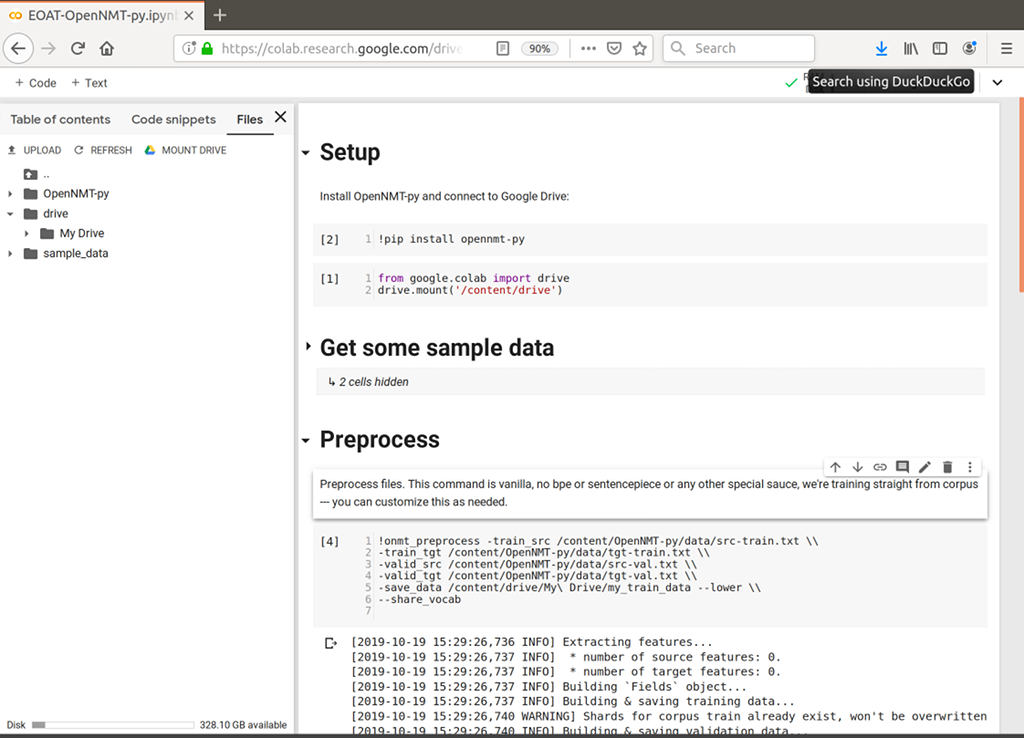
-
When prompted, click the link, choose an identity (or log in to Gmail), copy the code provided, and paste it into the code output window. Your Google Drive files should now appear in the left-hand pane, you may need to expand it and click Files and, if they don’t appear, click Refresh.
-
Let’s download the OpenNMT-py’s sample data so that you can get a quick demonstration of how you’d use this with your own data. Colab will copy the project to the /content folder:
!git clone https://github.com/OpenNMT/OpenNMT-py -
Preprocess the data (this is kind of vanilla for demo purposes, you can replace with whatever you need to use, and you may want to do some pre-pre-processing as well. See http://opennmt.net/OpenNMT-py/options/preprocess.html for available arguments):
!onmt_preprocess -train_src /content/OpenNMT-py/data/src-train.txt \\ -train_tgt /content/OpenNMT-py/data/tgt-train.txt \\ -valid_src /content/OpenNMT-py/data/src-val.txt \\ -valid_tgt /content/OpenNMT-py/data/tgt-val.txt \\ -save_data /content/drive/My\ Drive/my_train_data --lower \\ --share_vocab -
Check that you’re using GPU and check what you’re working with (right now, there’s always 1, with an id 0, but you never know!):
!nvidia-smi -
Create and run a training command like the following (yours may differ based on what your aims are; see http://opennmt.net/OpenNMT-py/options/train.html for all available arguments). Note that this command has very low steps so that it completes in a reasonable time for demo purposes. The retraining step will have more realistic parameters:
!onmt_train -data /content/drive/My\ Drive/my_train_data \\ -save_model /content/drive/My\ Drive/my-model \\ -layers 6 -rnn_size 512 -word_vec_size 512 -transformer_ff 2048 -heads 8 \\ -encoder_type transformer -decoder_type transformer -position_encoding \\ -train_steps 3000 -max_generator_batches 2 -dropout 0.1 -batch_size 4096 \\ -batch_type tokens -normalization tokens -accum_count 2 -optim adam -adam_beta2 0.998 \\ -decay_method noam -learning_rate 2 -max_grad_norm 0 -param_init 0 \\ -param_init_glorot -label_smoothing 0.1 -valid_steps 1000 -save_checkpoint_steps 1000 \\ -report_every 1000 -world_size 1 -gpu_ranks 0 -
Run it!
-
Then, when you inevitably get cut off (by design, you’re cut off after 12 hours — also, if you find it’s always busy after you’ve left it alone for awhile, try going to Runtime > Reset All Runtimes and you may be happily surprised), you’ll want to have a step that resumes training:
onmt_train -data /content/drive/My\ Drive/my_train_data \\ -save_model /content/drive/My\ Drive/my-2nd-model \\ -train_from /content/drive/My\ Drive/my-model_step_1000.pt \\ -layers 6 -rnn_size 512 -word_vec_size 512 -transformer_ff 2048 -heads 8 \\ -encoder_type transformer -decoder_type transformer -position_encoding \\ -train_steps 200000 -max_generator_batches 2 -dropout 0.1 -batch_size 4096 \\ -batch_type tokens -normalization tokens -accum_count 2 -optim adam -adam_beta2 0.998 \\ -decay_method noam -warmup_steps 8000 -learning_rate 2 -max_grad_norm 0 -param_init 0 \\ -param_init_glorot -label_smoothing 0.1 -valid_steps 10000 -save_checkpoint_steps 3000 \\ -report_every 1000 -world_size 1 -gpu_ranks 0 -
Now for the fun part: Translate!
!onmt_translate --model /content/drive/My\ Drive/my-model_step_1000.pt \\
--src /content/drive/OpenNMT-py/data/src-test.txt --output /content/drive/My\ Drive/translation-output.txt \\
--replace_unk -verbose
This will print to screen and give you an output file, run !cat /content/drive/My\ Drive/translation-output.txt to view the output. Remove --replace_unk to get <unk> in place of the untranslated text. I like replacing unknowns with the actual source words, because I can then run a post-processing script to lazy-replace untranslated words with target definitions. I also typically don’t use Colab for translation, but instead, the OpenNMT-py REST server on an EC2 instance or laptop.
Here’s an example of something I was goofing with, first the Google Colab command:
!onmt_translate --model /content/drive/My\ Drive/EOATONMT/my_model_step_220000.pt \\
--src /content/drive/My\ Drive/EOATONMT/delete.txt \\
--output /content/drive/My\ Drive/colabtransjulio.txt \\
--verbose --replace_unk
Google Colab output:
[2019-10-18 19:36:08,960 INFO] Translating shard 0.

SENT 1: ['Пред', 'всеми', 'судилищами', 'мира', 'включая', 'революционный', 'трибунал', 'РСФСР', 'и', 'жреца', 'марабута', 'Центральной', 'Африки', 'Учитель', 'предстал', 'бы', 'как', 'предатель', 'лжец', 'и', 'зачинщик', 'неисчислимых', 'преступлений']<br/>
PRED 1: Учитель by all the governments of the world including the Африки РСФСР and the Африки of Central Africa the teacher would be considered a traitor a liar and a зачинщик of crime

PRED SCORE: -21.3102

PRED AVG SCORE: -0.6659, PRED PPL: 1.946
Google Colab command:
!cat /content/drive/My\ Drive/colabtransjulio.txt
Google Colab output:
Учитель by all the governments of the world including the Африки РСФСР and
the Африки of Central Africa the teacher would be considered a traitor a
liar and a зачинщик of crime
The original text is “Пред всеми судилищами мира включая революционный трибунал РСФСР и жреца марабута Центральной Африки Учитель предстал бы как предатель лжец и зачинщик неисчислимых преступлений” which Google Translate gives as:
“Before all the judges of the world, including the revolutionary tribunal of the RSFSR and the priest of the marabut of Central Africa, the Teacher would appear as a traitor to the liar and instigator of innumerable crimes”
A professional translator gives us:
Before any court of justice in the world, including the revolutionary tribunal of the R.S.F.S.R. and the marabout-priest of Central Africa, the Teacher would appear as a traitor, a liar and the instigator of innumerable crimes.
And the model we hacked up using Google Colab and EC2 spot instances gives us:
Учитель by all the governments of the world including the Африки РСФСР and the Африки of Central Africa the teacher would be considered a traitor a liar and a зачинщик of crime
Not perfect, not great, needs a lot of work, but still pretty cool, especially as I didn’t really do anything special re:tokenization (no byte pair encoding) or much pre-pre processing at all besides cleaning up my corpora files.
Tip: Park Changjung has a great Google Colab tutorial that walks you through using BPE for subword tokenization. As the OpenNMT-py Python package is a relatively new development, the steps use OpenNMT-py pulled from source — you’ll need to clone the source code to access BPE scripts for subword tokenization, but you should still !pip install OpenNMT-py to ensure dependencies are installed; !pip install -r OpenNMT-py/requirements.txt has been made obsolete.
Now, it probably need not be said that you want lots of checkpoints — even with GPU, training is slow. I also suspect you may get rate-limited if you’re doing a lot…there are some interesting StackOverflow questions about that. I honestly wouldn’t blame them for limiting me, I have had a bit of fun with it…
Quick list of things I don’t like about Colab:
-
You have to keep the browser open and active (but hey, it’s free, and you’re consuming resources, so this seems fair, along with the 12 hour cutoff). This can be especially lame if you’re traveling and have cruddy/intermittent wifi. I’ve gotten into the habit of saving checkpoints every 1000 steps.
-
Code windows are annoying, would be nice to be able to enable wrapping for big command lines. I added backslashes in my examples, but I have a bad habit of never using them in real life.
-
It doesn’t seem possible to run multiple commands at once, for example, if you’re running training and want to check GPU status, the command just hangs in a busy state waiting for the training task to complete.
-
If you stop the training step, Google Drive sometimes disconnects and you don’t realize it until you run another step and get a “File not found” error. It’s easy enough to fix — just go back to the Google Drive step and press Play again, and it reconnects without having to auth. It’s annoying, though, especially as OpenNMT-py does a lot of thinking before it realizes it can’t find your files. :)
But Google Colab is still incredibly cool, quick and easy to get running (just minutes – a lot less painful than EC2!)…and it is free. And, if you are a real masochist, you can actually run it on an iPhone SE while doing real-life things like visiting loved ones in hospital rooms.
OpenNMT-py on GPU-enabled EC2 spot instances
Setting up OpenNMT-py is a little more involved on EC2 than on Google Colab. Google’s systems are already set up with a lot of the prerequisites, you don’t have to worry about drivers, and so on. Amazon does provide Deep Learning AMIs of various flavors, but I didn’t have a lot of success with them (one, when booted and updated, spit out a lot of errors about not being able to contact the NVIDIA repository that was hardcoded), so I ended up just keeping it simple and installing everything I needed onto a vanilla Amazon Linux 2 AMI.
For spot instances, my experience in US-East-1 is that you’re going to luck out on the bigger instances during the weekends and at the end of the week. I did get kicked off a g3.2xlarge with no more available early in the week, but have been merrily running an 8xlarge for a couple days now, Thursday through Saturday. Your mileage, of course, may vary. Spot instance prices haven’t seemed to vary for me, just availability.
Anyway, the EC2 setup is a little more involved than the Google Colab, so I’ve cut it into sections and based on your familiarity with AWS, and whether you decide whether to use my custom AMI or build your own:
Launching a Spot Instance
-
Log into the AWS console and search for EC2, then navigate to Spot Requests > Request Spot Instances.
-
Select Big data workloads.
-
Under AMI, you have two choices, depending on how much you want to DIY:
- To use the AMI I created, click Search for AMI, click Community AMIs, and search for ami-00184049d2e83d4f7 (it will be named “Seven Minute Server GPU-enabled Instance for OpenNMT-py).
- To use the base Amazon Linux 2 AMI and build from scrach, choose Amazon Linux 2 AMI.
-
Keep as an instance type enabled and click Change Instance Type. From the Instance Type drop-down, select GPU Graphics, and/or GPU Instances, and/or GPU Compute. Note prices and memory; for GPU info, see https://aws.amazon.com/ec2/instance-types/ » Accelerated Computing.
-
Choose anything that fits your needs except the G2 instances, which are too old. I tend to choose the g3s.xlarge or the g4dn.2xlarge, because you can typically get them for less than $0.30/hour. g3.8xlarge seems to be the cheapest multi-GPU system available right now, under $0.70/hour when I wrote this entry.
-
Select an availability zone, I don’t know if this matters so much, I usually choose something that I have a subnet for and only choose one. (It’ll yell at you later if you choose more than one.)
-
Choose a key pair or create a new one if you don’t have one already.
-
If you used my AMI, your volume will be auto-set to 90GB. Note that this storage will cost you money. If you’re using your own AMI based on Amazon Linux, give yourself enough space to store your data. Model files are ~1.5GB each, so make sure you give yourself enough space. We’re writing out to S3, but if you have a lot of checkpoints, you can use up a lot of disk.
-
Select or create a Security Group. I like to set mine that to the group my related systems belong to, makes it easy to copy stuff around if I need to. Also, the ports in my AWS security groups are locked down so that the only way in is through my VPN, makes things quasi-secure without a lot of extra thought.
-
Add a key titled Name and a name in the Value field for it — this just makes things easier when you’ve got a lot of instances.
-
Keep the default of 1 for Total Target Capacity.
-
In Fleet request, disable Apply recommendations, and click Remove next to every every instance type you didn’t select (typically everything after the first line). Otherwise, Amazon will give you something from that fleet and you may end up paying for something GPU-less.
-
Next to Additional Request Details, disable Apply Defaults, and enable Set Your Max Price and configure this to the max you’re willing to pay (sneaky Amazon hiding this!). Make sure it’s more than the spot instance price, though, or it won’t be fulfilled.
-
Click Launch.
-
This may take a few minutes. Once your spot request has been fulfilled, click the link that contains the Instance ID to open the instance list, then, once it’s up and running SSH using the SSH key you set up (you can now actually log in from the EC2 Dashboard if you want…just select the instance, click Connect, and choose EC2 Instance Connect (browser-based SSH Connection).
-
If you used my AMI, once you can skip to Running OpenNMT-py on Your Spot Instance.
-
If not, proceed to Configuring Your Spot Instance, below.
-
Configuring Your Spot Instance
This procedure is mostly sourced from Amazon’s documentation), with some extras specific to what we’re trying to do.
-
The first thing you’ll want to do is update the system:
sudo yum update -
Reboot your server because your kernel should have updated and you’ll need to load the new kernel before you install the NVIDIA driver.
sudo reboot -
After rebooting (yes, I was kind of surprised this worked nicely on a Spot Instance, too!), log back in and install the stuff we need:
sudo yum install python3 git boto3 sudo pip3 install OpenNMT-py -
Create a folder called
.awsin your home directory and add a file namedcredentials:mkdir ~/.aws && touch ~/.aws/credentials -
Add your aws credentials to
~/.aws/credentialsso that you can download the drivers from S3 (and later sync your data to s3). They should be in the format below.[default] aws_access_key_id = your_access_key_id aws_secret_access_key = your_secret_access_key -
Download the latest NVIDIA driver installer:
aws s3 cp --recursive s3://ec2-linux-nvidia-drivers/latest/ . -
Download the kernel source (the driver needs this):
sudo yum install -y gcc kernel-devel-$(uname -r) -
Disable the
nouveauopen source driver for NVIDIA via the/etc/modprobe.d/blacklist.conffile by running the following command:cat << EOF | sudo tee --append /etc/modprobe.d/blacklist.conf blacklist vga16fb blacklist nouveau blacklist rivafb blacklist nvidiafb blacklist rivatv EOF -
Blacklist
nouveaufromgrub, too:cat << EOF | sudo tee --append /etc/default/grub GRUB_CMDLINE_LINUX="rdblacklist=nouveau" EOF -
Upgrade
grub:sudo grub2-mkconfig -o /boot/grub2/grub.cfg -
Now we can install the driver:
sudo /bin/sh ./NVIDIA-Linux-x86_64-430.46-grid.run -
After the install’s complete, reboot (
sudo reboot). -
After logging back in, clone my repo, which contains a script that will run training while syncing to S3:
git clone https://github.com/jenh/epub-ocr-and-translate .
Running OpenNMT-py on Your Spot Instance
-
Check to make sure the GPU is active, it should look something like this:
[ec2-user@hostname ~]$ nvidia-smi Sat Oct 19 00:36:46 2019 +-----------------------------------------------------------------------------+ | NVIDIA-SMI 430.46 Driver Version: 430.46 CUDA Version: 10.1 | |-------------------------------+----------------------+----------------------+ | GPU Name Persistence-M| Bus-Id Disp.A | Volatile Uncorr. ECC | | Fan Temp Perf Pwr:Usage/Cap| Memory-Usage | GPU-Util Compute M. | |===============================+======================+======================| | 0 Tesla T4 On | 00000000:00:1E.0 Off | 0 | | N/A 70C P8 21W / 70W | 0MiB / 15109MiB | 0% Default | +-------------------------------+----------------------+----------------------+ +-----------------------------------------------------------------------------+ | Processes: GPU Memory | | GPU PID Type Process name Usage | |=============================================================================| | No running processes found | +-----------------------------------------------------------------------------+ -
Now you’re ready to preprocess. You can use your own files, but as a proof of concept, let’s use OpenNMT-py’s test files (we’ll use
ln -sto create a symlink to make our command line more readable.
Tip: See http://opennmt.net/OpenNMT-py/options/preprocess.html for all available arguments.
git clone https://github.com/OpenNMT/OpenNMT-py ln -s OpenNMT-py/data data onmt_preprocess -train_src data/src-train.txt -train_tgt data/tgt-train.txt \\ valid_src data/src-val.txt -valid_tgt data/tgt-val.txt -save_data data/data \\ --share_vocab -
If you installed from scratch, you’ve already populated your AWS credentials to use s3. If you’re using my AMI, pop open ~/.aws/credentials and add your AWS credentials so that you can sync to s3. (Note: If you decide to share your AMI publicly, remove your credentials — and any other private information — from the instance.)
[default] aws_access_key_id = your_access_key_id aws_secret_access_key = your_secret_access_key -
Now you’re ready to train! On Google Colab, we used OpenNMT-py’s onmt_train command. But here, we’re going to use a wrapper script I created to ensure everything syncs to S3. We’re going to start the command with
nohup, so that it will continue to run if we log out, and end it with&, so it will run in the background and we can keep using the active terminal. Here’s a sample command you can use:nohup python3 epub-ocr-and-translate/onmt-helpers/eoat-trains3.py \\ -data data/data -save_model my_aws-model -layers 6 -rnn_size 512 -word_vec_size 512 \\ -transformer_ff 2048 -heads 8 -encoder_type transformer -decoder_type transformer \\ -position_encoding -train_steps 200000 -max_generator_batches 2 -dropout 0.1 \\ -batch_size 2048 -batch_type tokens -normalization tokens -accum_count 2 -optim adam \\ -adam_beta2 0.998 -decay_method noam -warmup_steps 8000 -learning_rate 2 -max_grad_norm 0 \\ -param_init 0 -param_init_glorot -label_smoothing 0.1 -valid_steps 10000 \\ -save_checkpoint_steps 3000 -report_every 1000 -world_size 1 -gpu_ranks 0 \\ --s3_bucket my-onmt-training-bucket-from-102019 \\ --training_script /usr/local/bin/onmt_train &If you selected an instance with two GPUs, set
-world_size 2 -gpu_ranks 0 1(for more GPUs, update accordingly,-world_size 4 -gpu_ranks 0 1 2 3, and so on).If you get an s3 error about using an incorrect region, make sure your bucket is unique to you and your region — s3 bucket names have to be unique to a region, not just to a single s3 account (yay for enumeration hijinks). It’s safe to make it a bucket you’ve already created, or use something more complicated with dates involved.
Tip: See http://opennmt.net/OpenNMT-py/options/train.html for all available training arguments.
-
Run
nvidia-smiand you should see your process running! Time to sit back, open another terminal, log into your instance, and obsessivelytail -f opennmt-train.loglike a crazy person!
When you’re ready to translate using your models, put the string(s) you want to translate into a file and run the following:
```
onmt_translate --model data/my_aws-model_step_10000.pt \\
--src data/text-to-be-translated.txt \\
--output data/output.txt
--verbose --replace_unk
```
And, as you saw in Google Colab, if you want to retrain, you can run the same command line with -train_from my_model_step_nnnnn.pt to continue training.
Some caveats:
-
Don’t make the spot instance request persistent unless you’ve got some user data or init script set up that picks up and restarts training where you left off (this is totally doable, but I haven’t implemented it yet myself. Luckily, I was only losing .20/hour or something and it didn’t cut into my Alexabucks, but you can imagine how that sort of thing might cause trouble.
-
You’ll also want to go into S3 and prune unneeded models. They’re pretty big and if you’re like me, you take a lot of checkpoints (good because you never know when training will be interrupted! But bad because they’re huge files) and many aren’t needed.
Here’s a pretty basic command I use to figure out which models I want to delete, where opennmt-train.log is the log file with data (if you use my eoat-trains3 script, this is where it logs by default) and 5 is the beginning of the accuracy I was looking to delete – at the time, I wanted to keep my 60+ accuracy models, and zap the 50+ (this doesn’t delete anything, just lists them for you and you can then manually delete what you want):
for i in `ls *000.pt |awk -F "_|.pt" '{print $3}'`; do
grep $i opennmt-train.log |grep "acc:  5" |awk -F" |/" '{print $3}';
done;
Conclusions
If you’re going for speed and ease-of-use, Google Colab is ace. It takes minutes to set up and get running, and is totally free. You can quickly and easily share your notebooks with others. However, you do have to stay connected the entire time, you’re limited to 12 hour training sessions, and sometimes get disconnected when you least expect it. You should always set your checkpoints pretty low here. Google Colab also runs in a mobile browser. It’s not pleasant, but it absolutely works and is a little mind-blowing.
If you want a little more reliability and control over your environment and don’t mind paying and a more complicated initial setup, EC2 wins. You can also spring for a dedicated instance where you never have to worry about being interrupted.
Given both options, you can see why I’ve been passing models back and forth between them like 1.5GB ping pong balls. Or medicine balls, I guess, is more appropriate.
Overall, I’ve gotta say…we live in a charmed time (technology-wise, at least). It’s amazing that we’ve got this kind of computing power at our fingertips and anyone can use it to get a data science job done, no matter who or where they are.